Rentals
Creating Rentals
Walk through Dates, Terms, Renters, Review, validation rules, and import options.
Overview
Rentals are the operating record that connects a property, renter, rental dates, charges, payments, balances, invoice email settings, occupancy, and reporting.
A property must exist before you can create a rental. The usual path is to create rentals manually from the property record. If your rental data already exists in a spreadsheet, use the Import Center after your properties are loaded.
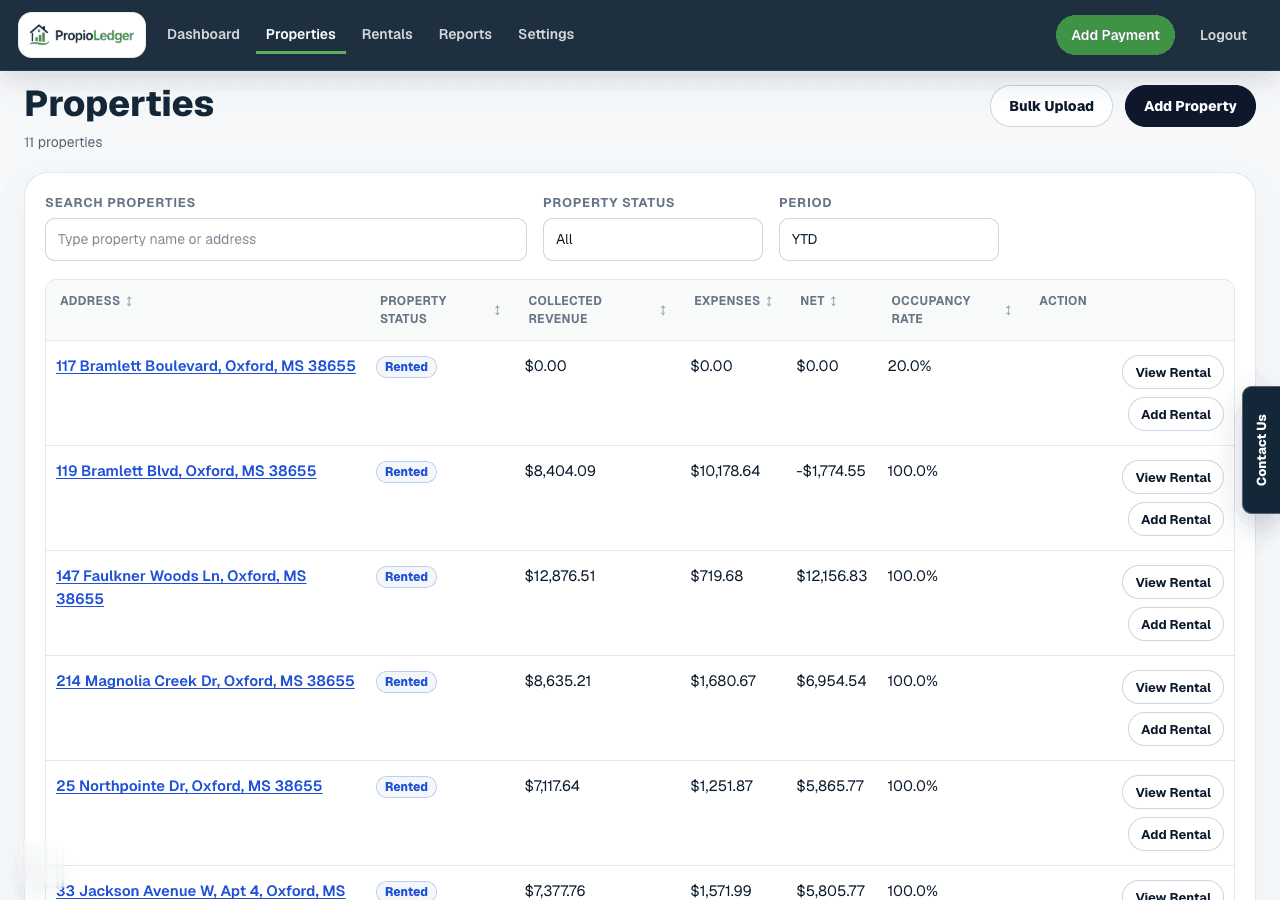
- Open Properties and choose Add Rental for the property.
- Select rental dates and confirm availability.
- Choose monthly or nightly terms.
- Add renters and contact details.
- Review charges, due dates, and renter information.
- Save the rental and verify balances from the Rental Ledger.
1. Open Properties And Choose Add Rental
Use the main navigation to open Properties. Find the property that needs a rental and select Add Rental from that row or from the property detail page.
Create rentals from the property that should receive the agreement so the rental is connected to the correct address, property defaults, availability calendar, and reporting history.
2. Select Dates And Confirm Availability
The Dates step asks for a rental start date and end date. Both dates are required, and the end date must be after the start date for nightly rentals.
PropioLedger checks the selected date range against existing rentals for the same property. Existing rentals, including ended historical rentals, keep their date ranges for availability so new rentals cannot be booked over them.
Future-dated active rentals display as Booked until their start date. Date-only end dates remain active through the local end day.

3. Choose Rental Terms
Choose Monthly for standard lease-style rentals or Nightly for short stays. Property default monthly and nightly rates prefill the rate field, but you can override the rental rate before saving.
Monthly rentals can include rent due day, prorated first month behavior, final partial month billing mode, late fee settings, and optional invoice email settings. Nightly rentals calculate the stay from nightly rate and night count and can include a booking-due amount plus a remaining due date.
Late fees and invoice emails are optional. Configure them only when they match how the rental should be billed and followed up.
4. Add Renters And Contact Details
Every rental needs at least one renter. Add the renter name, contact email, phone, mailing address, and any notes that help identify the agreement.
A rental can have multiple renters. Choose one primary renter so reports, lists, and balance views have a clear main contact.
Email fields must be valid when provided. Phone fields should contain a 10-digit U.S. number when provided.
5. Review Charges And Due Dates
The Review step is the last check before saving. Confirm dates, rental type, rate, renters, move-in charges, booking charges, due dates, invoice settings, and late fee settings.
Booked Rent is the rent-only value for the rental or stay. Booking Total or Total Initial Balance includes all configured charges. Due Today includes only charges whose configured due date is today or earlier.
Move-in and one-time charges each carry their own due date. Security deposits and pet deposits can affect balances, but they are not counted as rental revenue in revenue reports.
6. Save And Verify The Rental
After saving, the rental appears on the property page, rental lists, dashboard metrics, reports, alerts, and rental history based on its dates and status.
Use the Rental Ledger as the source of truth for charges, payments, waivers, refunds, due dates, open balance, and past due amount. If a rental starts with a balance, add payments or use the import opening balance workflow when onboarding historical rentals.
Future rentals reserve the property and display as Booked until the start date. Started rentals can be ended or extended. Future booked rentals can be cancelled before they start.
Import Rentals From A Spreadsheet
Rental import is optional. Use it when you already have rental history or active agreements in Excel or CSV and do not want to re-enter every rental manually.
Import properties first. Rental templates are generated from existing properties so each row includes company context, property IDs, property addresses, rental terms, optional late fee settings, optional invoice email settings, optional opening balance, tenant contact fields, mailing address fields, and notes.
Review rental dates, rent amounts, and opening_balance before upload. Past imported rentals are stored as ended. Active imported rentals may show open balances until you import payment history, add payments manually, or use opening_balance to reconcile charges through today.
Common Questions
- Do I have to import rentals?No. Create rentals manually when that is easier. Use rental imports when you already have spreadsheet data available.
- Can I create a rental before adding the property?No. Rentals must be connected to an existing property.
- Can I override the property default rate?Yes. Default rates prefill the rental form, but the saved rental rate can be changed before saving.
- Why does my rental show Booked instead of Active?A future-dated active rental displays as Booked until the rental start date.
- Can I cancel a rental after it starts?No. Started rentals should be ended so occupancy, reporting, and history stay accurate.
- Why does a new rental show an open balance?The Rental Ledger creates charges from the rental terms and configured move-in or booking charges. Add payments, waivers, refunds, or opening balance reconciliation as appropriate.
- Can one rental have multiple renters?Yes. Add multiple renters and choose the primary renter for reporting and contact display.
Last Updated
May 2026